Showing posts with label colouring. Show all posts

Sunday, August 28, 2016

Amazing birthday haul!

My boyfriend was real sneaky this year. I have a wish list on Amazon with colouring books and while he gained some inspiration from it, he never the less got me no less than three colouring books that weren't on the list but that were really spot on with what I love! I must say I'm really impressed. Not only with his choices but the fact that he encourages extending my colouring book library that already occupies an entire - albeit small - bookshelf. 


First I'm going to talk about these two beauties. I'd never heard of these books before; they are illustrated by Korean artist Jae Eun Lee and it's always interesting to see what an artist from a culture with very different artistic traditions makes of European themes and vice versa. I was impressed with the illustrations; they depict very accurate renditions of artefacts, fashion etc and in one of the pages I even recognised the palace gardens of Sanssouci! The illustrations are drawn with a touch of the Asian attention to detail and delicacy that really sets them apart from other books. That said, they are not that insanely detailed as say Tomoko Tashiro's books, aside from all the detailed work they do have plenty of larger areas for adding gradients, shading or your own details. I always love that balance in a book. I also love how both books are based on the original stories that have very little to do with the Disney versions. A bit of history and culture/literature lesson combined with colouring, can a girl ask for more?

The most awesome thing about these books is the versatility of the illustrations. In Beauty and the Beast, you will find interiors, costumes, portraits, fantasy creatures, landscapes, still life (food, beauty etc), flowers, and even decorative patterns. So no matter what you feel like colouring this book is guaranteed to have several pages to suit your mood.
In the Snow Queen there aren't so many interiors and rather more pages with animals such as deer and birds, and also beautiful landscapes. Both books are, in my opinion, pretty advanced. How about an entire double page filled with mirror shards?! Whew. But of course, like any book, this one is also what you make of it. I actually found my Pitt artist pens to be excellent in them, as the ink will make colouring progress quite quickly and the detailed bits will sort of create their own highlights and shadows so there is no need to overwork them with coloured pencil. But I do look forward to trying out my Polychromos as well!

The paper in both books is quite white but a little bit more ivory than in Lost Ocean. So it's a warm white hue. The paper quality is, thank Goodness, very good, Pitt pens don't bleed or shadow so there shouldn't be a problem with water-based supplies. 
Below I have videos of flipthroughs of both books. Enjoy!


The Snow Queen:


The third book is by indie artist Scot Howden. The books is called Colouring Fantasy and contains 24 images of all kinds of fantasy ladies: shieldmaidens, dragon trainers, mermaids, steampunk girls, fairies and so on. The images are fairly sensual without being too erotic. The lineart is more grey than black which makes it easier if you want to make them disappear under layers of colour. The only drawback of this book is the paper quality: it's an Amazon print-on-demand book and unfortunately Amazon only offers one kind of paper for anyone. So Amazon, will you please pay attention to all the artists out there so we can get books on paper that is worthy of all the amazing artwork out there? Thank you.
However the pages are single-sided so you should be fine with any media that isn't too wet because the paper would buckle considerably even with Pitt pens or Inktense used with very little water. I recommend coloured pencils for this book. 
For colouring inspiration I recommend visiting Scot's Facebook page where most of the gals in the book can be viewed as his original art. He really is a sublime colourist and I will so steal his colours! ;)
Here is a flipthrough of the Colouring Fantasy book:

Monday, May 16, 2016

Open stock Inktense

So the other week I wrote a long post on Instagram on how I discovered that I could have gotten away with getting a much smaller set of Polychromos and never missed a fair few of my 60 set. The post got a much better reception than I had anticipated, it seems I'm not the only one who doesn't think it necessary to go and get the full set of every art supply on the market. I'm not judging, honestly, if it gives you joy and you can afford it, then way to go! I love seeing poeple's haul posts! But personally I take a more practical - and tight-budgeted - approach to colouring supply purchases and look at what I actually need and will use.
Having written that post got me thinking about my next purchase. Ever since discovering Peta Hewitt's tutorials I'd wanted to use my Inktense pencils much more, but I really felt the 24 was too small. I missed some nice greens and rich yellows, among other shades. At first I was glancing at the full 72 set but upon closer inspection I realized that it, too, containted plenty of colours I couldn't see myself using, and/or shades that were very close to each other. So I started looking around the open stock pencils on offer and in the end I purchased 18 additional pencils to my 24 set. So now I have 40 colours plus the black and the outliner. And I couldn't be happier! I got exactly the colours I want the most and don't have to pay for any I won't use. I chose some beautiful cool teals, warm yellows, warm greens and rich neutrals - don't you just adore the Red Oxide and the Madder Brown especially?
Here's a swatch of my current collection.The colours are quite accurately photographed, the paper is really this cool hue drawing paper.


I decided to store the pencils tip down in a round container. At the bottom I put some sheets of paper towel so the tips will stay safe when I put them back. This way i can conveniently see both the colour coded ends and the names - a necessity since Derwent doesn't bother colour coating the entire pencil. 


Another change I made was go through my Polychromos, pick out the ones I really didn't like and put the rest in a beautiful glass container that I decorated with découpage paper and a silk ribbon. I ended up with 40-something pencils which sort of pushes the boundries of the container but I make it work because it looks so much prettier than the big ol' tin! The pencils left inside the tin I'm using for a #rarelyusedchallenge where I colour a page using those very pencils I usually avoid! If you want to challenge yourself using colours you're usually not comfortable with, go ahead and use the #rarelyusedchallenge on Instagram to display the result! The contributions are starting to come in, I will also post mine as soon as I finish at least some of the 20-ish WIPs I have going at the moment. There are no prizes or anything, it's not a contest, just a thing to try if you need a little extra challenge in your colouring!

Wednesday, March 16, 2016

Marco Raffiné pencils - swatch and first impression

So it finally arrived, my box of the 72-count Marco Raffiné coloured pencils! I had seen the colouring community swoon and rave over these pencils for the past 6 months so I just had to see what all the fuss is about. I took the plunge when I saw the pencils being sold on Amazon for a similar price as Ebay. Earlier Amazon had some sellers but the price was so much higher than Ebay or Aliexpress that I couldn't justify getting them. Reports of ridiculously long delivery times from Ebay and Aliexpress deterred me from getting them from these sites, also I love Amazon's customer service whose generosity and solution focused approach has saved me on several occasions.

The first thing that struck me was the weight of the box. I don't know what I had thought but just seeing photos of the box never made me think it would weigh so much! It felt nice in my hand. However I discarded the box straight away, I hate flimsy cardboard boxes. Some people also complained about a strong chemical smell but I attributed this to the box. The pencils themselves smell good like wooden colouring pencils should. (I always sniff on everything new!)

The pencils never struck me as particularly handsome and real life confirmed this. The silvery finish is more plasticky than silvery and is unevenly applied on some pencils. The hexagonal shape and colour indicator on top are OK features. The wood is of varied quality: some pencils are flawless while others shave away quite a bit. However I was pleasantly surprised by the lead quality as I sharpened the whole 72 set and only got one minor tip breakage which was fixed with just a little bit more sharpening. All pencils arrived seemingly undamaged so I'm hoping that no leads are broken further inside the pencils!

The pencils have no colour names but fortunately they are numbered in a straightforward fashion, from 501 to 572, making swatching a breeze. I made a handdrawn colour chart as I currently don't possess an operating printer. Or, there is a printer but it's ink and I'm afraid to use it in colouring because the lines might smudge from blenders and such so we haven't really plugged it in.

Upon swatching I soon discovered that the individual pencils vary in quality within the set: some glide nicely along the paper giving off even and rich pigmentation, while others feel waxy and smeary and leave a patchy result. I therefore took a leaf out of Faber Castell's book and marked the individual pencils with dots from 1-3 depending on how smooth or smeary they feel. I fear the smeary ones will be very difficult to layer and blend, in addition to the feeling that you're pushing candle wax around the paper. (I know they're oil based but this is the best description to the feeling I can come up with.) Here's my quality scale and the number of pencils in each category:
3 dots (19 pencils): Superior quality, rich pigmentation, glides smoothly on the paper and leaves an even coat of colour
2 dots (38 pencils): Good quality, enough pigmentation, possible to layer and blend, no hesitation in using them. 
1 dot (15 pencils): Smeary and uneven result, and/or poor pigmentation. Use with caution in case it's a unique shade I don't have in other sets.

Palette wise I have mixed emotions. The purples and greens are great especially as I'm fussy with my greens and for example I'm not impressed with the greens in my 60 count Polychromos as I find there are to many cold greens in that set. The Raffinés contain many warm green shades that you're more likely to find in nature. The purples are also warm and rich and the yellows are surprisingly pigmented. However I find there could have been a couple more blues in stead of having so many greys. Six shades of grey are entirely too much in a set of 72. The browns and maroons are very nice, however to my disappointment, two of the dark neutrals I most looked forward to using turned out to be one-dotters. Otherwise the one-dotters seem to be mainly lighter pastelly colours which sort of makes sense, if the manufacturer achieved the pale shade by adding more binding material in stead of using a different pigment combination.

How these pencils perform on different kinds of paper and in different situations such as layering, burnishing and using with blending tools, remains to be seen. In any case I'm really looking forward to taking them for a test drive today!

Monday, March 14, 2016

Welcome Spring!

March is a particularly difficult month for me. Having lived in Hungary for several years I got used to Spring arriving in early March, with the trees starting to turn green at the turn of March/April. In these parts of Sweden March is still very much a winter month, although the snow is mostly gone and you can start seeing some fresh green moss for example. Still the temperatures are barely above freezing and there will be several minus degree days yet. Therefore I tried to colour the moth of March as cheerful as I could, with all sorts of pastelly colours. 
Mad sketching skillz!
I also included a small freehand drawing project. Since March 15 marks the anniversary of the Hungarian revolution in 1848, which is one of three Hungarian national holidays, I added the symbol of this holiday to the calendar: a cockade in the Hungarian colours red, white and green. I had never drawn such an item before so I started with looking one up on the internet. There I traced the outlines onto a bit of tracing paper that I then transferred onto a sketch pad where I experimented a bit with colours and shading. I finally transferred the sketched outlines onto the calendar page and proceeded with colouring it in. Considering my drawing skills and particularly the fact that I haven't practiced drawing for many years (or let's be honest, I have precticed drawing NEVER), I'm really quite pleased with the end result! It looks so much nicer in real life too. 


The tree is coloured in Faber-Castell Pitt Artist brush pens, and the cockade in Polychromos.


Wednesday, March 2, 2016

Blending stumps!

Pages from Dagdrömmar and Color me Calm where I prepared the background using Polychromos and paper stumps.

I get a lot of requests to explain about the paper stumps I so frequently use in my colouring projects. So here is a long overdue summary about this great tool! I personally find myself going more and more away from the colourless blender pencil, which I feel gives a more streaky and uneven finish, and using the paper stump more and more as I like the smooth smoky surface it gives. I have used it mainly for backgrounds in the past but nowadays I blend everything but the finest details with the paper stumps.
First of all, this is what they look like - a roll of cardboard with two pointy ends. You can find them in any art supply store and they are very inexpensive. I learned that there is a similar tool called a tortillon, which is hollow. These stumps are solid all the way through. I have never come across hollow tortillons in Sweden but you might want to know the difference if they are a thing in your country.

Like I shortly mentioned in my previous video, paper stumps are ideal for larger surfaces. But as they come in a variety of sizes, you can use them in quite detailed areas as well. 
Depending on how much pigment you have laid down with your pencil, you can use a very light hand, barely grazing the paper, or a more heavy touch, when blening. If you have several layers of colour on the paper it's enough to just lightly go over the paper with the stump to get a nice smoky blend. The stumps will conceal some of the streakiness in your colouring, but the blending will be much nicer if you try to lay down the colour as evenly as possible. You can clearly see the difference in this closeup where the orange bits were quite haphazardly coloured whereas the surrounding blue parts were coloured much more carefully before blending.
You can also use your blending stumps together with blending agents such as Gamsol or vaseline. However I only use mine dry so I cannot say anything about those methods. If I ever get around to trying that I'll make an update post about it!

As you can see in the first photo I keep a stump roughly per colour family. However these guys require cleaning from time to time. This is done with a piece of fine-grained sandpaper which I picked up at a hardware store. I cut the sheet in smaller sized squares so they would fit into a drawer compartment in my desk. 

Cleaning them like this will ensure they don't mess up your colour scheme and keep their point. If the point becomes too used up and frayed I just use a pair of scissors to cut it off then sharpen it again on the sandpaper. As the stumps are made of solid cardboard they will last a very long time. However if you find yourself with a pencil cup full of "dirty" paper stumps, you can create a craft project of its own and not let that precious pigment go to waste. One evening when I had no colouring inspiration I started scribbling on a blank sheet of sketching paper with a dirty stump. And before I knew it I had created this pastelly background that I can later fill with a drawing of some kind.


Below you will find a comparison closeup of two similar fields, the top one with no blending, just the layering of 2 Polychromos pencils, and the bottom one blended with a paper stump. And finally I enclose a short video that shows the layering and blending process. I hope this was helpful - Happy colouring!


Sunday, February 28, 2016

Art Therapy Scandinavia

The Art Therapy line of colouring books has popped up in many countries. You know the A4-sized rather thick books with a cardboard front cover that has the front page image glued to it. There are dozens of books in the series: Art Deco, Islamic tiles, Indian patterns and so on. While on vacation in Rome, I saw a book in this series with Scandinavian patterns. Interestingly, this book is yet to be published in Sweden so naturally I picked it up. It has since become one of my favourite colouring books!


Art Therapy Scandinavia is a hybrid of named artists work and Shutterstock images. (Please follow this link for an explanation/review of Shutterstock books.) Above is the cover which is a sturdy brown paper glued to the usual thick cardboard cover which is typical for this series. I actually like this binding, it's an inexpensive way to make strudy colouring books which you can colour on your lap when space is tight.
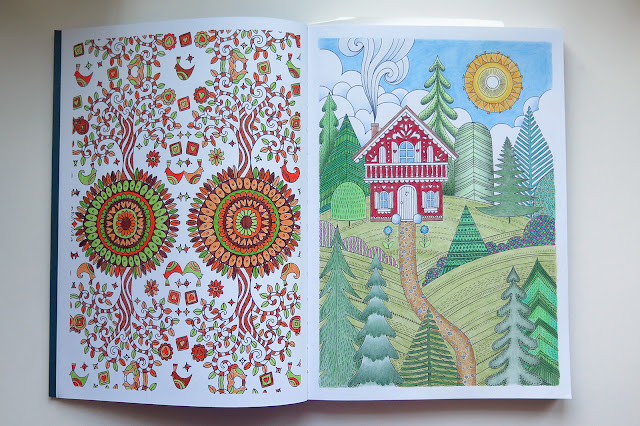
Inside one of the first pages is this lovely stylized landscape with the cottage which I have coloured in using Polychromos pencils.
Like most Shutterstock books, the paper is not perfect but still sturdy enough to hold water-based markers and fineliners without any bleeding. The pages are double-sided and not perforated, but the book opens up nicely so there is no struggle reaching the innermost parts of the page.The designs are also not printed all over the page, there usually is a clear margin of a few centimeters which also makes it easier to reach the edges.

Many of the pages contain folk-art patterns common in different Swedish and other Scandinavian regions. In the Dalarna region these patterns are called "kurbits". These are great fun to colour although most of them are not very detailed. But of course every pattern is what you make of it, you can put as little or as much effort into something as you feel like at the moment. These patterns are quite quick to colour with the Faber-Castell Pitt Artist pens with the brush nib being the perfect size for this amount of detail. 

Two "Kurbits" patterns coloured with F-C Pitt Artist pens
There are also other patterns in the book which is wonderfully varied. Some are folk inspired, others are a representation of typical Scandinavian landscapes, towns or traditions such as coffee-drinking :) Here are some more examples.

The left one is also done in the Pitt artist pens, while the right image is a WIP with Polychromos.

Overall, this book is one I reach for whenever I want a bit of a fancyful and diverse relaxation. It contains everything from decorative folklore patterns, whimsical coffeecups, a few stylized urban and interior scenes and many other lovely designs. The book is also very well edited so that all the images maintain approximately the same style of art, even though they come from several different artists. So if this book is available in your country, I definitely recommend you go and pick it up. And Swedish publisher Tukan förlag, I'm looking at you - bring this book to Sweden pronto!

[UPDATE] My colouring friend on Instagram, @girl_with_javacurls, asked to see some pictures from the book so here they are, in extremely poor photo quality :


WHSmith colouring pencils - a review

A few days ago I started swatching my 36 count WHSMith colouring pencils. I was pleasantly surprised! Here's a review of these pencils.
- The pencils come in a glossy cardboard box with a plastic holder. I can see myself discarding this in the future as I tend to keep smaller sets of pens/pencils in clear containers. The design is lovely, with a dark grey pencil and colour indicators on the top. The hexagonal pencils are comfortable to hold and have a matt finish.
- The colour selection is really nice. You get all your usual primaries and secondaries that you usually see in a set of this size, and there are also some lovely and unique shades with a surprisingly good neutral palette. For example the dark teal one (last one in the third row) is one I see myself using a lot. The magenta and the brick colour are my other favourites in the set. The only shades I'm not crazy about are the two brightest yellows. They are not really pigmented and the next two yellow shades would be fully enough. But I've never been a fan of light, cool yellows, I'm more of a saffron yellow kind of person.
- The pigmentation is a pleasant surprise. These pencils are more affordable than the Staedtler Noris Club ones (at least in our currency that is the case) but lay down such a nicer pigment. You can get a vibrant colour almost instantly with very little pressure. The pencils are layerable and blend very well with each other. Compared to the Polychromos they lay down a bit more streaky colour and feel a bit more scratchy against the paper, but this can be corrected using a bit of layering. 
- The pencils came in the mail and although they were very well wrapped, it's not unusual for the leads to be damaged during transport. I haven't notice any broken leads and the pencils sharpen easily to a very fine point which they keep for a reasonable amount of time. As they are rather soft, I expect they will spend a fair amount of time in the sharpener, but this is the price for soft, pigmented pencils that lay down a creamy colour.
- I tried blending using two tools: a paper stump and a blender pencil. The paper stump easily gave the best result with these pencils. The gradient came out smoky and perfect, whereas the blender pencil mostly made a streaky, blotchy mess of the swatch. I can see myself using the blender pencil on very small areas but for anything of even the size of these swatches, a fine paper stump would be the more ideal blending tool of the two.


Conclusion: If you can get your hands on these pencils, go for it! If you already have a selection of pencils these will be great for a smaller set to take with you on the road or to add some new shades to your palette. If you're new to colouring, you may use these for a long time before feeling the need to graduate to a larger set or more prestigious brand. 

PS. When I started Lost Ocean a few days ago, I was going to use the 24-count Noris Club pencils for the whole book. But shortly after finishing the title page my hands started aching from the pressure I had to use and I was frustrated by the weak pigmentation. So I'm switching to this set of WHSmith pencils for the whole of Lost Ocean. Wish me luck!

Shutterstock books vs artist books!

When I first started purchasing colouring books I soon discovered that some publications were made up of compliations of Shutterstock images rather than displaying just one artist. In this post I am going to do a review of Shutterstock books, tell you about what to look for and avoid and also some of the pros and cons of this type of publications.

Shutterstock is a huge online stock image bank where anyone can upload their images (drawings or photographs) for sale. Shutterstock takes a large piece of the revenue and the rest is transferred to the artist. The upside is of course that you get a platform to sell your images where buyers can search based on theme or keywords. This gives a potential to be found on a gigantic market and there is a chance for huge sales. Many photographers make a living off stock sites; they take pictures that have the potential to sell to different publications. You know those illustrations in brochures of piles of coins or people shaking hands or someone smiling into a headset? Typical stock photography. 

Earnings breakdown of Shutterstock.
Anyhow, Shutterstock is also home to many colouring pages and some of the largest publishing houses have jumped on the bandwagon and are churning out dozens and hundreds of books based on Shutterstock compilations. This is a quite different form of publishing compared to "single artist" books where the publisher works directly with an artist to make a book containing images from that particular illustrator. Johanna Basford is perhaps the best known such artist but there are a bunch out there such as Hanna Karlzon or another favourite of mine, Jenean Morrison.
You typically recognize Shutterstock books from the fact that they lack the name of any one artist on the cover. They could be a part of a series such as the Art Therapy books (although there are named artists featured in series of books too). Most of the time the image sources are displayed as Shutterstock and sometimes the name of the Shutterstock artists are displayed as well.

The Cons

One of the main problems with Shutterstock books is that you may encounter dupes or duplicates of images you already have in another such book. Occasionally the same image can appear multiple times within the same book! One of the stock books I have has double spreads where one image is full size and the other is a slightly enlarged version. I find this a lazy editing at best and bordering on a ripoff at worst. I mean, just look at these two pages:


The first page the left side is simple an inverted version of the right one. And the second page is just an enlarged and a zoomed out version of the exact same image. Like I said, this is really sloppy in my opinion and a cheap way to fill a bunch of pages that you then sell for 8 euros. Compared to how much more work must have gone into Johanna Basford's books that sell for 10-12 euros, I find these books very expensive in comparison.

Another con with these books is the paper quality. Very rarely is the paper good enough to hold even water-based markers or fineliners. The same fineliners that work perfectly in Secret Garden bleed through in many stock books. 

My third problem with these books is I don't know how much the artist gets paid for usage of their images. Probably not that much. I imagine if a publisher strikes a deal with an artist, the artist gets a chance to negotiate the contract so that everyone gets a fair share of the profits. Stock images are often purchased royalty-free, that is the buyer pays a fixed price for the image regardless how many times that image is then sold on. 

The Pros

Shutterstock books aren't all that bad though, and for all the con points there is a pro counterpart:

- Dupes can be a great way to practice and make different versions of an image without the need to make copies. If you like your books the way they are and don't care much for loose colouring pages, this is actually a great pro.
- Stock books give you a chance to explore the work of perhaps dozens of artists within the same book. This gives great variety and ensures you never tire of the patterns, and also gives you a chance to try new styles of pages. You may not love every page but most pages turn out beautiful when coloured, even if at first you're not thrilled with the lineart.
- The paper is not a problem with colouring pencils which is perhaps the most used medium anyways. Every limitation is also a challenge at the same time.
- The artists who upload to Shutterstock are in no way forced to sign the terms and agreements. I sell my photos through Getty Images who sells them for up to 700 euros a piece of which I receive perhaps 10%. But without Getty the photo would never have been sold at all because I hate selling stuff. So it's a great way to have someone else take care of everything for me and all I do is upload images I took just as a hobby (so no extra work) and receive some money to my paypal from time to time. 
- Ultimately, both stock books and single artist books contribute to the vast selection of books out there, so that everyone can find their favourites - For example, in this book I really love the square size and that each page is neatly framed in a small pattern. I love, love, love framed pages! 
Having stock books as well as single artist books on the market also enables more people than just the most noted artists to benefit from this huge new market of adult colouring. 

Here is a page from the above book. The book itself is one I picked up while vacationing in Rome. It's called I Libri Antistress Fiori from publisher EdiCart.

In the next post I will present and review my personal favourite from Shutterstock books which is also one of my absolute favourite colouring books!

Monday, February 22, 2016

A double page from Secret Garden

I spent several weeks on these pages. They are blended with the Caran d'Ache colourless blender pencils that I demonstrated in the video in the previous post. (If you clock on the picture a larger version will appear.)


A place to belong

Since I took up colouring I have learned about the therapeutic benefits of this lovely hobby. I myself don't have any "issues", at least not any diagnosed ones although there is something I probably should see someone about - but just to handle the day to day stress, colouring is amazing. But equally amazing is the colouring community! I have seen many forums, facebook grups et cetera but nowhere do I experience such an encouraging and loving atmosphere as in the two colouring groups that I recently joined. People are really supportive and caring towards each other and for a shy introvert such as myself to be so welcomed and reassured, it really lifts my spirit several times a day and restores faith in humanity. 

Shortly after I took up colouring I joined a Swedish group. There I had quite different experiences. (I don't think it has to do with ethnicity or nationality, it's more the culture that develops in a certain group, much depending on the direction the admins steer it to) There was hardly a week or even day without some sort of drama. Often it would be someone who got upset about other people's purchases and questioned why hauls of books/supplies were even posted in the group, claiming it was offensive to all those who at that time couldn't afford to purchase those items. But people could also be offended if someone was thought to be too "skilled" or artistic. Often there would be drama around a person complaining that their work wasn't good enough for the group and the "talented" members got too many likes. In the end the admins made the decision to ban the posting of purchases/items in again. I left the group before a ban on too pretty colouring was introduced ;) no but seriously, it just seemed that way too many people found a way to turn this relaxing and therapeutic hobby into just another source of frustration and anxiety. That felt completely wrong! 
I find both hauls and majestic images very inspiring even if I cannot afford everything and definitely am not as talented as some people out there. But the thing I love most about belonging to these Facebook communities is to see people get so much joy and relaxation from their hobby!

Major haul of books and pencils!

How it all began...

I guess the story of how I came to love adult colouring is one of learning humility and open-mindedness. I had seen adult colouring books, notably Secret Garden, popping up around Swedish bookstores in the summer of 2015. I remember being utterly provoked by such a stupid idea. I couldn't for the life of me understand the point of taking someone else's artwork and adding colours to it. I viewed this as almost immoral or at the very least a completely meaningless pastime. 
Then in August my sister, who had no idea of my sentiments towards adult  colouring, sent me my birthday gift. It contained a copy of Secret Garden and an assortment of coloured fineliners. I nearly fell out of my chair laughing and was convinced that she really missed the mark this time. However I did want to give it a go just to see what all the fuss was about. Like I said, this was in mid August of last year and I have hardly stood up from my colouring ever since.

I was, to put it mildly, hooked from the start. It was instantly relaxing, gratifying and just pure fun. I soon dug out long forgotten art supplies I had from another life when I tried to draw and sketch with very little luck. Then I discovered the mind-boggling selection of adult colouring books on Amazon and other bookstores and, well, the rest is history. I have never been so glad to be proven wrong in my life!

My very first attempt at adult colouring. Secret Garden and Staedtler Triplus 0.4 roller pens